
How Do You Tan a Raccoon Hide in 7 Essential Steps?
To tan a raccoon hide, first, gather essential tools like a fleshing knife, fleshing beam, non-iodized salt, tanning solution, and protective gear. Skin the raccoon while making precise incisions and remove excess fat and flesh with care.
Clean the hide using a fleshing knife followed by a thorough wash in lukewarm, soapy water and a rinse in clean water. Prepare and apply the tanning solution as directed, guaranteeing even coverage.
Stretch the hide on a sturdy frame while maintaining proper tension during drying. Guarantee workspace safety by following chemical safety protocols.
Mastering these initial steps will lead to a professionally tanned hide.

Key Takeaways
- Make precise incisions at the tail base and along legs, removing excess flesh and fat.
- Clean and wash the hide with lukewarm water and mild detergent, then rinse thoroughly.
- Apply tanning solution evenly by submerging the hide and agitating periodically for proper penetration.
- Secure the hide to a sturdy frame, ensuring even tension for uniform drying in a ventilated area.
- Monitor the hide continuously during drying, adjusting tension to prevent deformities and ensure proper shape.
Gathering Necessary Tools

To effectively tan a raccoon hide, you will need to gather essential tools. These tools include a fleshing knife, a sturdy fleshing beam, non-iodized salt, a tanning solution, rubber gloves, and a set of stretching boards.
The fleshing knife is paramount for removing excess fat and tissue, ensuring the hide is clean and ready for tanning. A fleshing beam provides a stable surface, allowing precise control during the fleshing process. Non-iodized salt is critical for curing the hide, drawing out moisture and preserving it before tanning.
The tanning solution chemically transforms the hide into leather, ensuring durability and flexibility. Rubber gloves are necessary for safety, preventing direct contact with chemicals. Finally, stretching boards maintain the hide's shape and facilitate even drying.
Skinning the Raccoon
When skinning the raccoon, begin by ensuring you have all necessary tools and equipment, including a sharp knife, fleshing beam, and gloves.
Execute precise initial incisions at the base of the tail and along the legs to facilitate clean removal of the hide.
Carefully remove excess flesh and fat, ensuring the hide remains intact and undamaged for the subsequent tanning process.
Necessary Tools and Equipment
A successful raccoon skinning operation requires a sharp blade, a sturdy pair of pliers, a fleshing beam, and appropriate safety gear such as gloves and protective eyewear. Precision tools are essential to achieve clean cuts and avoid damaging the hide. A fleshing beam provides a stable surface for removing fat and tissue, while pliers assist in grasping and pulling the skin. Safety gear minimizes the risk of injury and exposure to pathogens.
| Tool | Purpose | Notes |
|---|---|---|
| Sharp blade | Accurate cutting | Maintain blade sharpness |
| Sturdy pliers | Grasping and pulling skin | Recommend handles with good grip |
| Fleshing beam | Support for fleshing process | Ensure firmness |
| Gloves | Hand protection | Opt for durable, puncture-resistant |
| Protective eyewear | Eye protection | Ensuring clear vision and safety |
Attention to these tools guarantees efficient skinning and excellent hide quality.
Initial Incisions Technique
Initiating the skinning process requires making precise incisions along the raccoon's hind legs and around the anus to facilitate the removal of the hide. Begin by suspending the raccoon by its hind legs. Using a sharp, narrow-bladed knife, make an incision from the heel of one hind leg, continuing along the inside of the leg to the anus. Repeat on the opposite leg.
Carefully encircle the anus with a cut, ensuring to avoid puncturing internal organs. Next, create a longitudinal incision from the anus to the base of the tail. This step is essential as it establishes the primary lines of separation for the hide. Employ steady, controlled movements to maintain the integrity of the fur and underlying tissue.
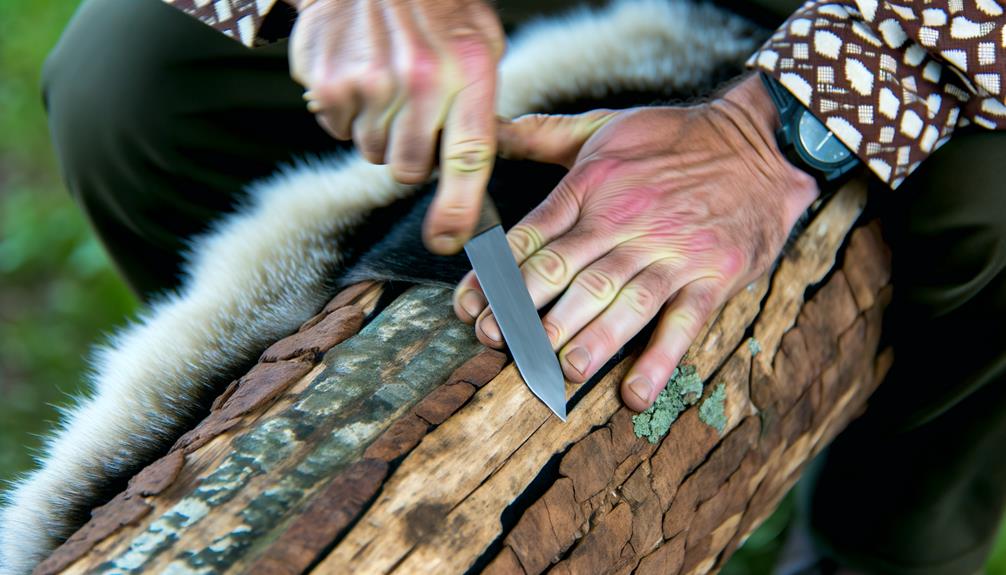
Removing Excess Flesh
Using a fleshing knife, carefully separate the skin from the underlying muscle and connective tissue to guarantee the hide remains intact and undamaged. Begin by placing the hide flesh-side up on a fleshing beam or similar rounded surface to provide support. Employ controlled, even strokes with the fleshing knife, moving from the head towards the tail. Maintain the knife's edge sharp to prevent tearing the skin.
Pay particular attention to areas with thicker fat deposits, such as the abdominal region, which require more meticulous effort. Continuously check for remaining tissue and fat, as any leftover material can impede the tanning process.
Once the hide is clean, rinse it thoroughly with cool water to remove any remaining debris.
Removing Excess Flesh
Effectively removing excess flesh from a raccoon hide requires a specialized fleshing knife and a sturdy fleshing beam to guarantee the hide is properly prepared for the tanning process. The fleshing knife, designed with a sharp edge, maintains precision in removing fatty tissue and residual muscle. Secure the hide on the fleshing beam, making sure it is taut. Use downward strokes with the fleshing knife, keeping consistent pressure to avoid damaging the hide's epidermal layer.
| Tool | Purpose | Technique |
|---|---|---|
| Fleshing Knife | Removal of fatty tissue and muscle | Sharp, precision |
| Fleshing Beam | Support and tension for the hide | Secure and taut |
| Downward Strokes | Efficient flesh removal | Consistent pressure |
This meticulous process is essential to prevent spoilage and guarantee the tanning agents can penetrate effectively.
Washing the Hide
Properly washing the hide is essential to remove any remaining fats, blood, and dirt, ensuring it is clean and ready for the next steps in the tanning process.
Submerge the raccoon hide in a large container filled with lukewarm water mixed with a mild detergent or specialized hide soap. Gently agitate the hide by hand to dislodge contaminants, paying particular attention to the fur side. Allow the hide to soak for 15 to 20 minutes.
After soaking, thoroughly rinse the hide in clean, lukewarm water to remove all soap residues. Excess water should be carefully squeezed out, not wrung, to avoid damaging the hide.
Lay the hide flat or hang it to drip dry in a well-ventilated area.
Preparing the Tanning Solution
To prepare the tanning solution, start by gathering the essential ingredients. These typically include salt, alum, and a mild acid such as vinegar.
Once you have all the components assembled, mix them in precise ratios to guarantee an effective tanning bath.
It is crucial to adhere strictly to safety precautions. This includes wearing gloves and working in a well-ventilated area to avoid any potential hazards.
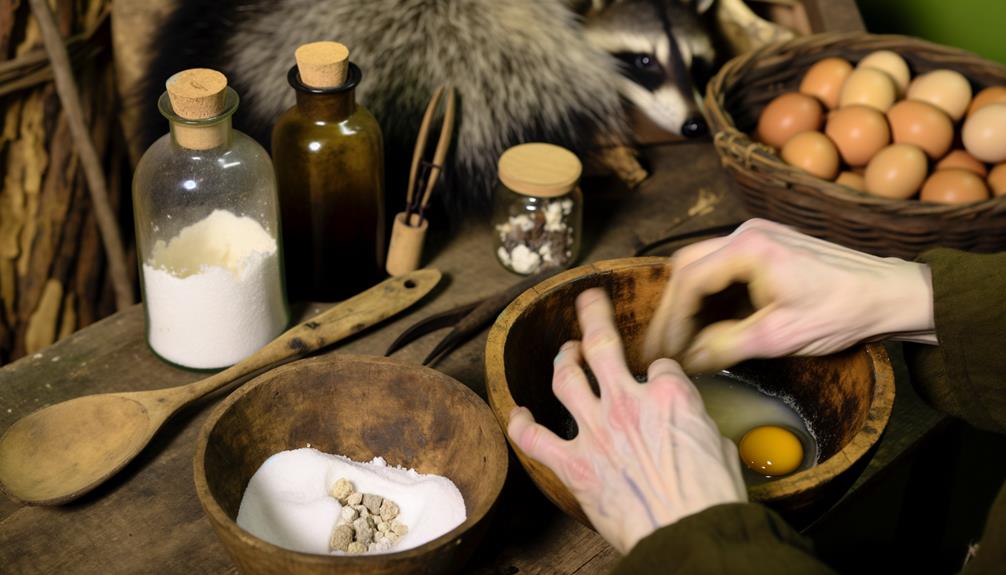
Gathering Necessary Ingredients
Creating a high-quality tanning solution requires assembling a specific set of ingredients, each contributing to the chemical processes required for preserving and softening the raccoon hide.
The following elements are essential:
- Non-iodized Salt: This serves to dehydrate the hide, halting bacterial growth and preparing it for the tanning process.
- Alum: Used as a tanning agent, alum penetrates the hide, ensuring a firm yet pliable end product.
- Boric Acid: This acts as a pH regulator, maintaining the solution's acidity to prevent any potential damage to the hide.
- Water: Essential as a solvent, water facilitates the even distribution and absorption of the other ingredients.
Assembling these components with precision is necessary for achieving ideal results in tanning the raccoon hide.
Mixing the Solution
Begin by thoroughly dissolving the non-iodized salt and alum in a large container of water, ensuring the solution achieves complete saturation before introducing the boric acid. Use a ratio of one pound of non-iodized salt and half a pound of alum per gallon of water.
Stir the mixture continuously until both components are fully dissolved, leaving no undissolved particles. Next, gradually add three ounces of boric acid to the saturated solution, stirring constantly to maintain uniformity. The boric acid acts as a buffering agent, helping stabilize the pH level of the tanning solution.
Once fully integrated, the solution should appear clear and homogenous. This prepared tanning solution is now ready for the subsequent steps in the hide tanning process.
Safety Precautions
Guaranteeing safety during the preparation of the tanning solution is paramount, requiring the use of appropriate personal protective equipment (PPE) such as gloves, safety goggles, and a lab apron to prevent chemical exposure.
When handling potentially hazardous chemicals, strict adherence to safety protocols is crucial to mitigate risks. Follow these steps meticulously:
- Ventilation: Make sure the workspace is well-ventilated to avoid inhalation of fumes.
- Chemical Handling: Use chemical-resistant gloves to protect skin from corrosive substances.
- Eye Protection: Wear safety goggles to shield eyes from splashes.
- Proper Storage: Store chemicals in clearly labeled, tightly sealed containers away from incompatible substances.
Applying the Tanning Solution
Applying the tanning solution to the raccoon hide requires a meticulous process to guarantee the preservation and pliability of the fur and skin.
Begin by thoroughly mixing the tanning solution according to the manufacturer's instructions, ensuring the appropriate concentration.
Submerge the hide completely in the solution, ensuring even coverage. Gently agitate the hide periodically to facilitate penetration of the tanning agents into the dermal layers.
Maintain the hide in the solution for the recommended duration, typically 12-24 hours, depending on the specific tanning formula used.
Once the hide has been adequately soaked, remove it carefully and allow excess solution to drain. Properly wringing out the hide minimizes solution waste and prepares it for subsequent processing steps.
Stretching the Hide
To achieve best results when stretching the raccoon hide, it is vital to begin by preparing a strong frame tailored to the hide's dimensions.
Next, methodically secure the hide to the frame using sturdy fasteners, guaranteeing even distribution to prevent distortion.
Maintaining proper tension throughout the drying process is essential to achieve a uniformly tanned and pliable hide.
Preparing the Frame
Properly stretching the hide onto the frame is essential to guarantee even drying and to maintain the hide's shape during the tanning process. Begin by constructing a sturdy frame using durable wood or metal, making sure the dimensions accommodate the entire raccoon hide.
Follow these steps for best possible results:
- Measure and Cut: Accurately measure and cut the frame materials to match the hide's size, allowing for slight tension.
- Assemble the Frame: Securely assemble the frame using screws or bolts, making sure it remains stable and rigid.
- Attach Eye Screws: Evenly space eye screws around the perimeter of the frame to facilitate the stretching process.
- Prepare Twine: Cut appropriate lengths of twine for lacing the hide, making sure they are strong enough to maintain tension without breaking.
This meticulous preparation ensures a strong foundation for stretching.
Securing the Hide
Securing the hide involves carefully lacing it to the frame, maximizing uniform tension to prevent any warping or uneven drying.
Begin by placing the hide flesh-side up on the prepared frame. Use a sturdy, non-stretchable cord, threading it through pre-punched holes around the hide's perimeter. Start at the top center, working your way outwards in a systematic crisscross pattern. Pull the cord taut but avoid overstressing any single point.
Continue lacing until the entire hide is firmly attached, checking for even distribution of tension. The goal is to maintain a flat, evenly-stretched surface to facilitate peak drying and tanning.
This meticulous approach guarantees that the hide retains its shape and integrity throughout the tanning process.
Maintaining Proper Tension
Maintaining proper tension during the drying process is essential to guarantee the raccoon hide dries evenly and prevents any deformities or inconsistencies. To achieve this, follow these precise steps:
- Frame Construction: Build a stretching frame using sturdy materials such as hardwood or metal to ensure stability.
- Stretching Technique: Attach the hide to the frame using non-corrosive, rust-resistant nails or clips, starting from the center and working outwards.
- Tension Adjustment: Continuously monitor and adjust the tension to prevent excessive stretching, which can cause tears or distortions.
- Drying Conditions: Place the framed hide in a well-ventilated area with consistent temperatures to facilitate even drying.
Drying the Hide
To effectively dry the raccoon hide, it is important to stretch it on a frame or board to ensure even air circulation and prevent shrinkage. Secure the hide with tacks or clamps, maintaining its tautness.
Position the hide in a well-ventilated area, preferably with low humidity to enhance the drying process. Avoid direct sunlight, as UV rays can degrade the hide's fibers.
Monitor the hide periodically to guarantee it dries uniformly, adjusting the tension if necessary. Best drying usually takes several days, depending on environmental conditions.
A properly dried hide should exhibit a firm texture without any damp spots, indicating readiness for subsequent tanning procedures. This meticulous drying process preserves the hide's integrity and prepares it for further treatment.
Breaking the Hide
Breaking the hide involves a meticulous process of softening and stretching the dried raccoon pelt to achieve the desired suppleness and flexibility. This step is critical for transforming the hide into a usable material.
The procedure includes the following steps:
- Dampen the Hide: Lightly moisten the hide with water to make it pliable. Avoid soaking to prevent damage.
- Stretching: Secure the hide and pull it in all directions to break the stiff fibers.
- Scraping: Using a blunt tool, scrape the hide to further break down the fibers and enhance flexibility.
- Repetition: Repeat the stretching and scraping until the hide reaches the desired softness.
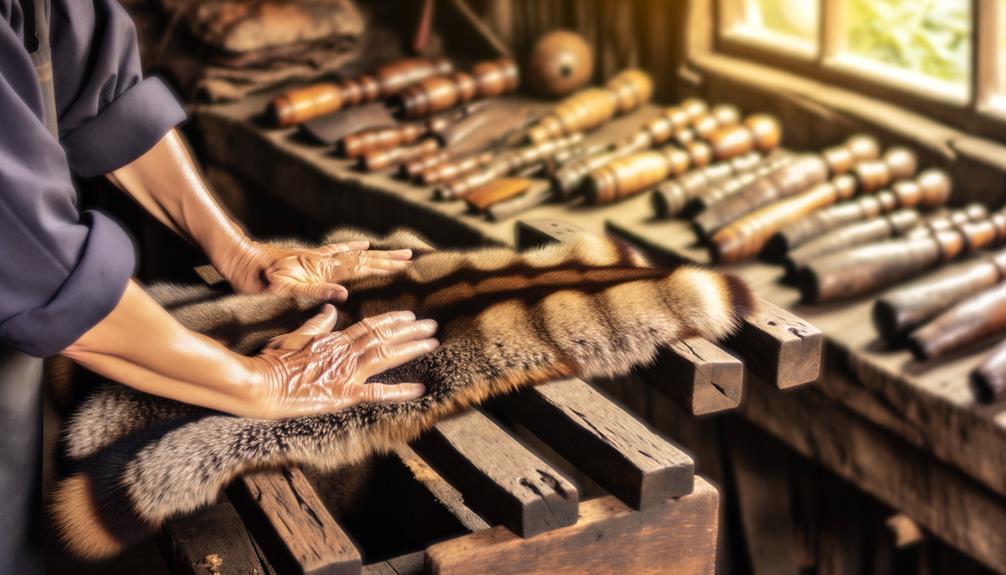
Softening the Hide
Softening the hide requires the application of specialized oils and mechanical manipulation to guarantee the leather achieves maximum pliability and durability. Begin by stretching the hide over a rounded surface, such as a breaking beam, to work the fibers repeatedly. This action should be performed using consistent pressure to prevent any tears.
Employ a hide softening tool or a smooth, rounded object to further break down the fibers. Throughout the process, periodically rehydrate the hide with a damp cloth to maintain its pliability. Flex and twist the hide in multiple directions to achieve uniform softness.
Consistent and thorough mechanical manipulation is pivotal in ensuring the hide remains supple, enhancing both its usability and longevity.
Oiling the Hide

Applying the appropriate tanning oil is an essential step in achieving the desired softness, flexibility, and longevity of the hide. Follow these detailed instructions meticulously:
- Selection of Oil: Choose a high-quality tanning oil specifically formulated for furs and hides.
- Preparation: Warm the oil slightly to enhance absorption. Make sure the hide is clean and partially dry, retaining slight dampness.
- Application: Using a soft brush or cloth, apply the oil evenly across the flesh side of the hide, working it carefully into the fibers.
- Penetration: Fold the hide flesh side inwards and let it rest for 24 hours in a cool, dry place to allow the oil to deeply penetrate.
These steps ensure ideal conditioning for the raccoon hide.
Storing the Finished Hide
Proper storage of a finished raccoon hide is fundamental to maintaining its quality and preventing deterioration. To secure longevity, the hide must be stored in a cool, dry environment with minimal light exposure. Ideal conditions include a temperature range of 50-60°F and relative humidity levels around 50%.
Place the hide in an acid-free, breathable container, such as a cotton bag or archival box, to allow air circulation and prevent mold. Avoid plastic bags, which can trap moisture. Additionally, store the hide flat or rolled, not folded, to prevent creases and damage to the fur.
Periodically inspect the hide for signs of pests or mold, and apply a light dusting of borax as a preventative measure.
Conclusion
The process of tanning a raccoon hide involves several meticulous steps, including:
- Skinning
- Fleshing
- Washing
- Tanning
- Breaking
- Softening
- Oiling
- Storing the hide
Each step requires specific tools and techniques to guarantee the hide is properly preserved and remains durable.
An interesting statistic highlights that traditional tanning methods, such as brain tanning, have been used for over 12,000 years. This indicates a long history of human ingenuity in hide preservation and showcases the enduring value of these practices.